Use Case – How dynamic task flow activated conditionally.
Implementation – We have two ADF application .One is consumer application which have two task flow
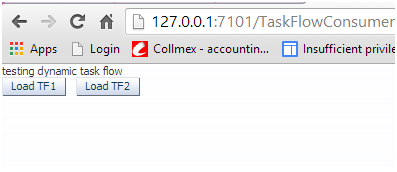
Now we have consumer application which show no task flow on load.Task flow will be shown on click of button .If you click task flow 1 then tf1 will be called and vice versa.Till the button is clicked neither tf1, nor tf2 wud be executed.
Create Producer application-
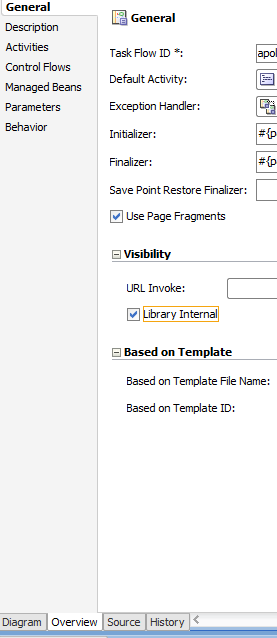
Create an new ADF application. Create two new task flow as Sample1TF and Sample2TF as below –
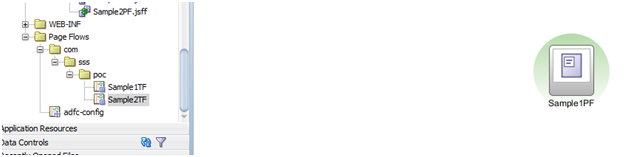
Now in each task flow drag drop and view activity and Sample1PF in above screenshot.Same steps need to be done for Sample2TF. Drag drop again an view activity as Sample2PF.jsff
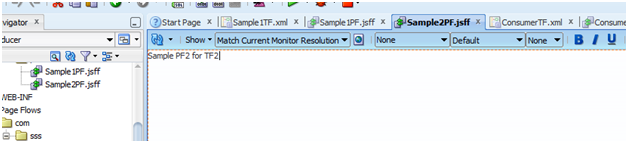
Sample2PF.jsff will be like this
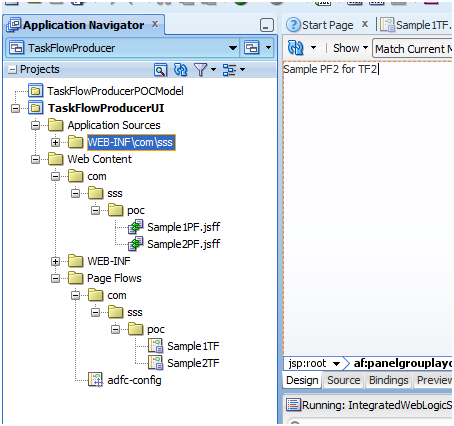
Now project structure would be like
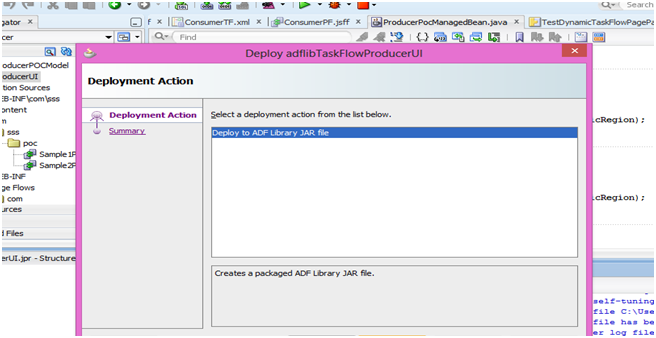
Now the deploy this project as ADF library jar.
Create Consumer Application –
Now we will be creating an consumer application. We will create an .jsff page with two button. Clicking on any button will called specific task flow.
We will drag drop region in the page and task id will be called .Binding of the page is as follow-
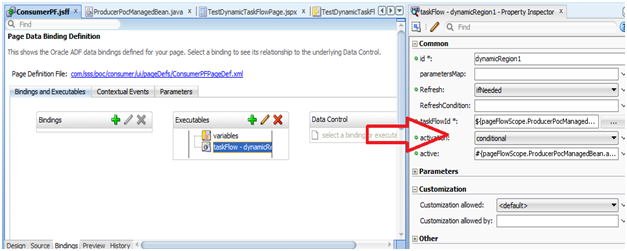
activation: Though you can specify values like conditional/deferred/active for this flag, in this post I discuss conditional activation. Setting activation=conditional, activates the ADF region if the EL expression set as a value for the task flow binding ‘active’ property(discussed below) returns true
active and task flow id will passed through an managed bean.Code of following bean as below
public class ProducerPocManagedBean {
private String taskFlowId = “/WEB-INF/com/sss/poc/Sample1TF.xml#Sample1TF”;
private Boolean activateRegion = Boolean.FALSE;
private RichRegion pocDynamicRegion;
public ProducerPocManagedBean() {
}
public TaskFlowId getDynamicTaskFlowId() {
return TaskFlowId.parse(taskFlowId);
}
public void setTaskFlowId(String taskFlowId) {
this.taskFlowId = taskFlowId;
}
public String getTaskFlowId() {
return taskFlowId;
}
public void setActivateRegion(Boolean activateRegion) {
this.activateRegion = activateRegion;
}
public Boolean getActivateRegion() {
return activateRegion;
}
public void loadTF1AL(ActionEvent actionEvent) {
// Add event code here…
activateRegion = Boolean.TRUE;
taskFlowId = “/WEB-INF/com/sss/poc/Sample1TF.xml#Sample1TF”;
AdfFacesContext.getCurrentInstance().addPartialTarget(pocDynamicRegion);
}
public void loadTF2AL(ActionEvent actionEvent) {
// Add event code here…
activateRegion = Boolean.TRUE;
taskFlowId = “/WEB-INF/com/sss/poc/Sample2TF.xml#Sample2TF”;
AdfFacesContext.getCurrentInstance().addPartialTarget(pocDynamicRegion);
}
public void setPocDynamicRegion(RichRegion pocDynamicRegion) {
this.pocDynamicRegion = pocDynamicRegion;
}
public RichRegion getPocDynamicRegion() {
return pocDynamicRegion;
}
}
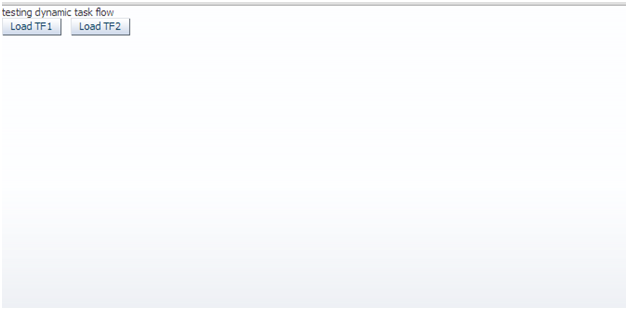
Then drag drop this jsff into one .jspx page. That’s all .Now you can run the application. Following will be screenshot of the page.
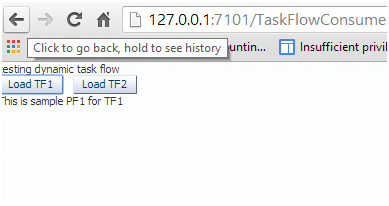
Click on button Load TF1
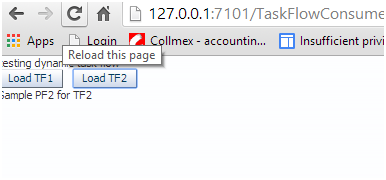
Click on button Load TF2
check attached for source code
DynamicTaskFlowPOC
Happy Learning with Vinay Kumar in techartifact
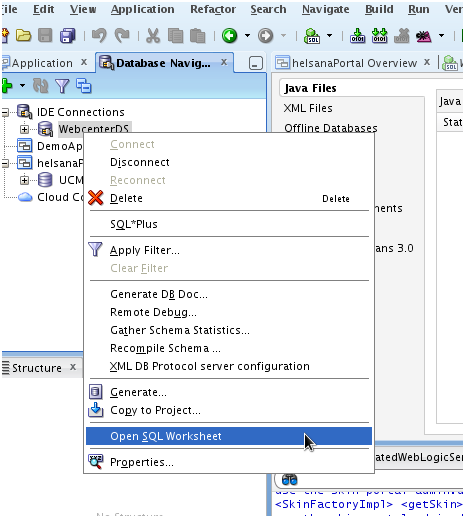
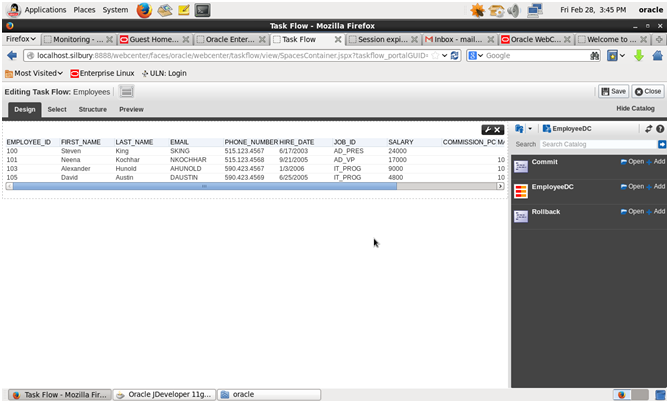
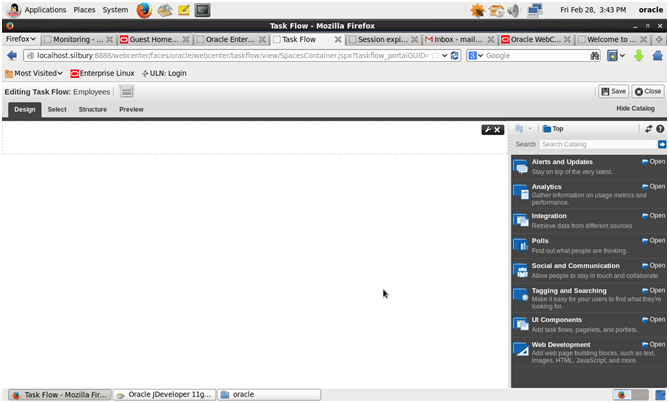
 → Make task flow available
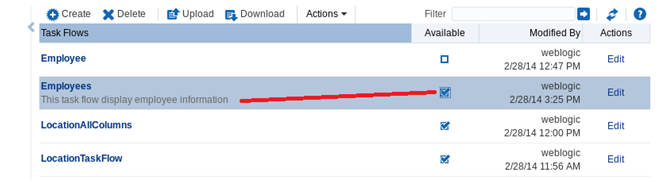


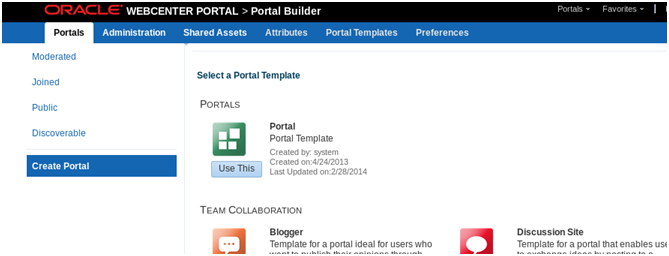
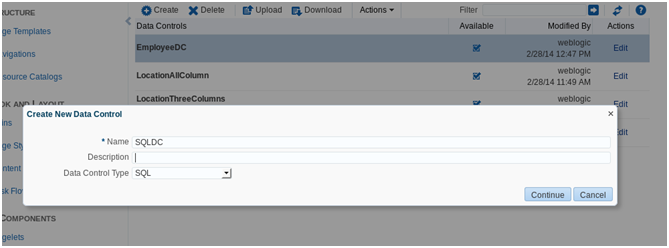
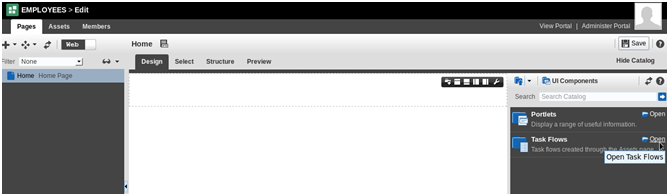
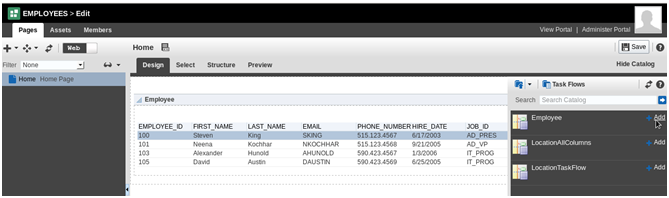
 ->Click Create
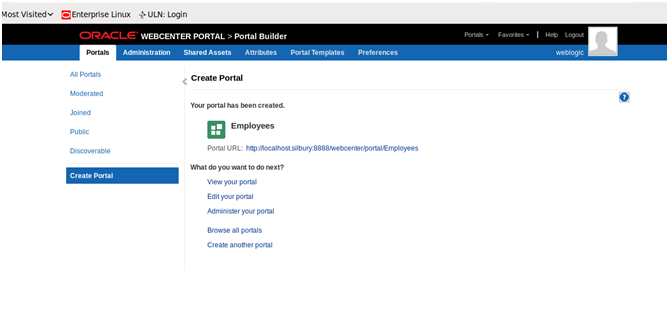
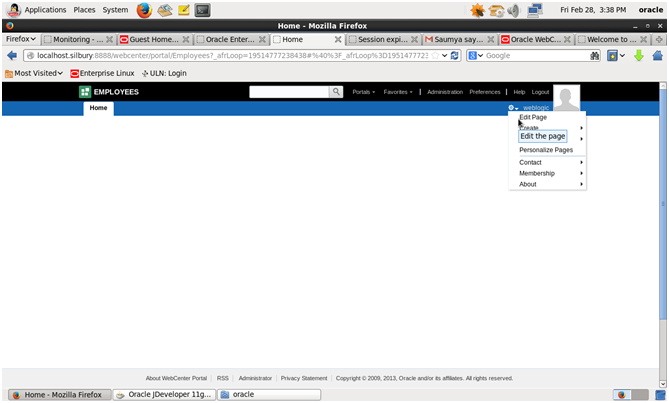
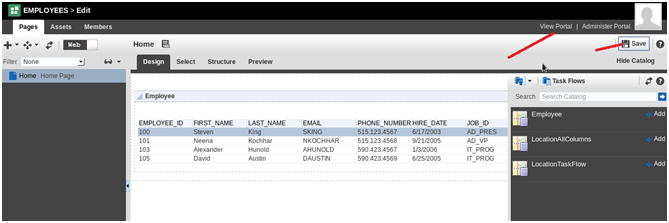
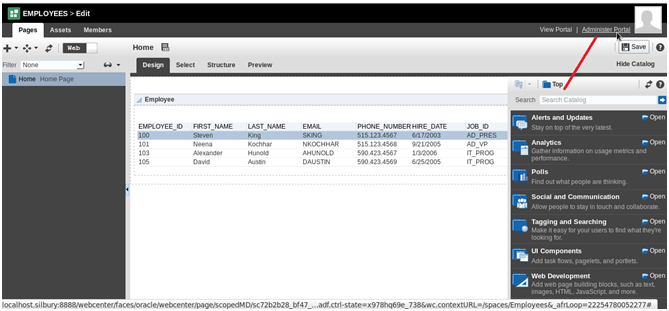
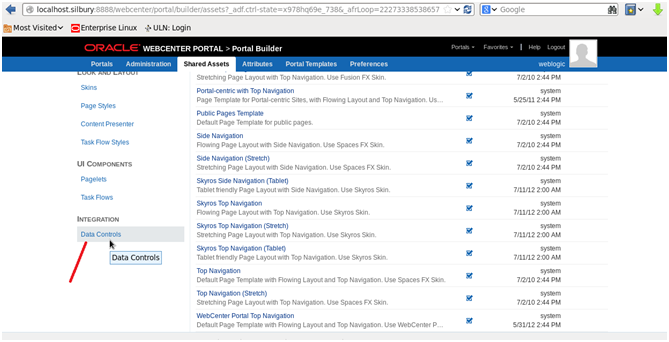
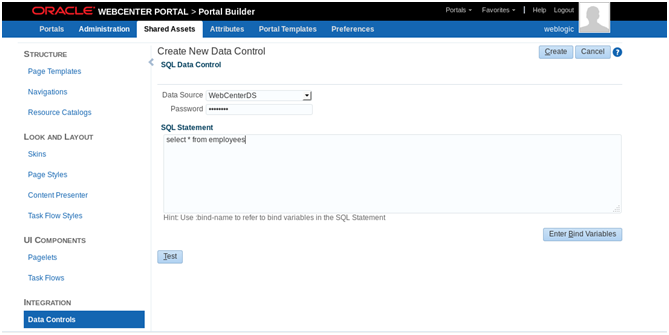
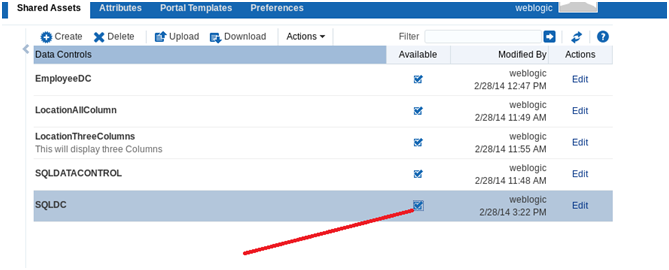
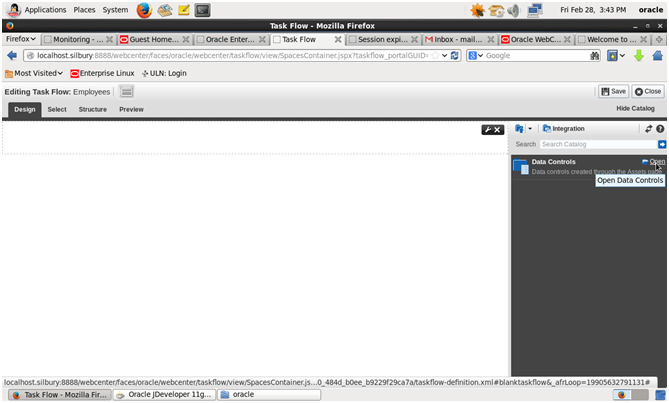
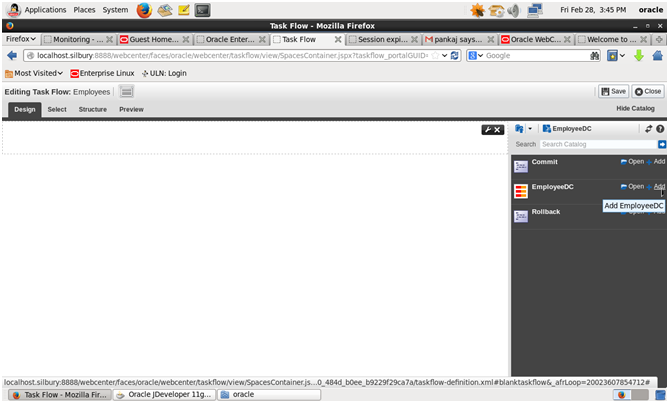
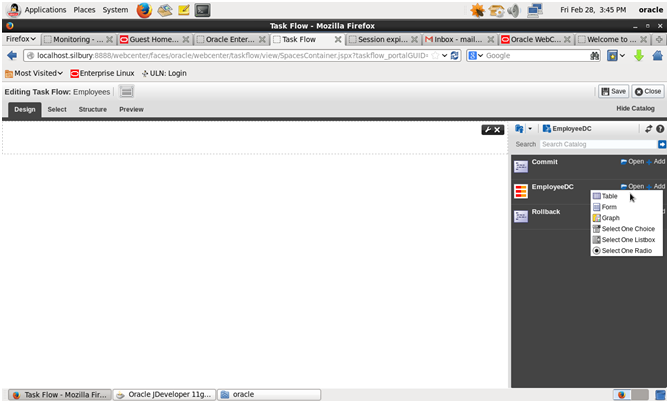
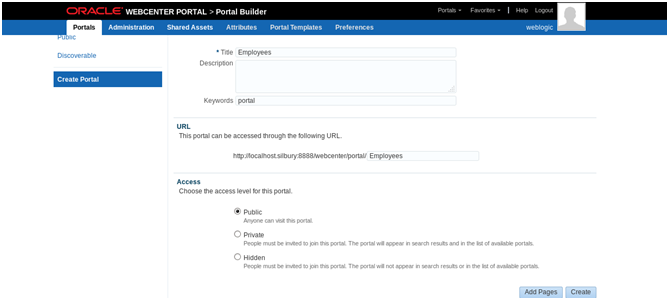
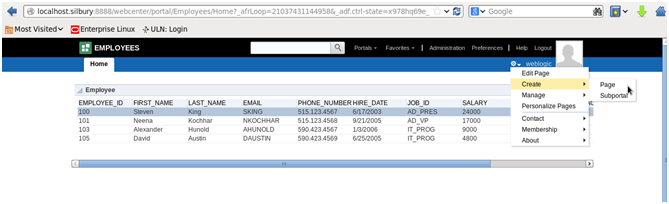 → If you want to navigate back to Data control or change query or add new task flow -click on edit page then Administer Portal