Changing default Navigation Model in Webcenter portal

Requirement- In your webcenter Portal application , if you dont want to use seeded navigation model and you create your own navigation model and you want to make your navigation model
as default navigation model.

Implementation – When you create an Webcenter portal application using create new application and selection Webenter Portal application then seeded navigation model, default-navigation-model.xml, is set as the application’s default navigation model. Now if create your own navigation model to use for the main navigation path through your application, rather than having to explicitly reference this navigation model whenever you want to use it, you can set it as the default.
You can set the default navigation model for a Portal Framework application by editing the oracle.webcenter.portalapp.navigation.model preference in the adf-config.xml file.

-> Open the adf-config.xml file

-> Click the Source tab.Locate the ADF preference with the following id:

      oracle.webcenter.portalapp.navigation.model
      

-> Set the value attribute to the path of the navigation model that you want to use as the default for the application, for example:

value=”/oracle/webcenter/portalapp/navigations/techartifactNavigationModel.xml”

Below is adf-config.xml will look like

<preference id="oracle.webcenter.portalapp.navigation.model"
            desc="Default Navigation Model"
            value="/oracle/webcenter/portalapp/navigations/techartifactNavigationModel.xml"
            resourceType="navigation" display="true"/>

-> Save the adf-config.xml file.

Happy learning with Vinay Kumar in techartifact

Creating Data Control & Task flow in Webcenter Portal Builder

Prerequisite – Webcenter portal and Webcenter Spaces should be installed and there schemas as well.

Database should be installed in database. For this sample demo –I created sample tables in Webcenter schema .

You can connect to database using creating new connection

→ Please find attached script and execute in the database.

→ Open the link – http://localhost.silbury:8888/webcenter (Might be localhost for you)

→ Go to Shared Asset

→ Go to Data Control – Create

→ Click continue.

→ Select WebCenterDs – enter password- enter sql query as below in screenshot

→ Click Create.And make available for using in catalog .

→ Now Click on Taskflow -Create

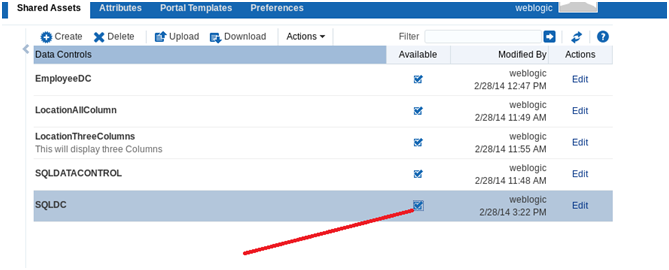
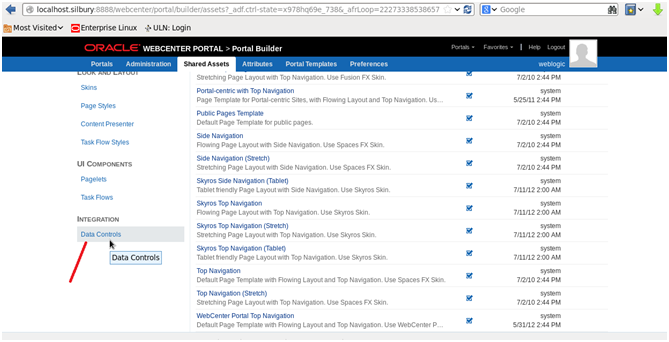
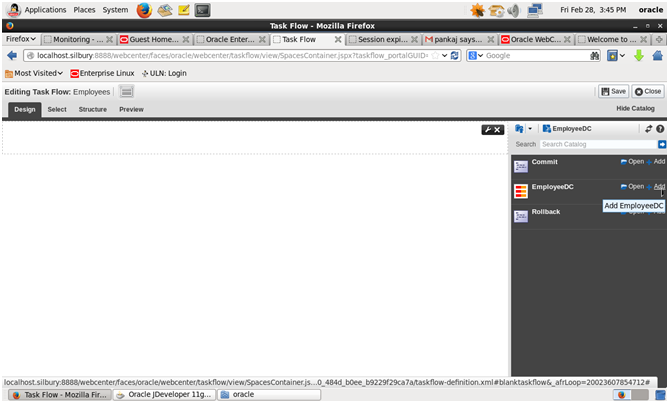
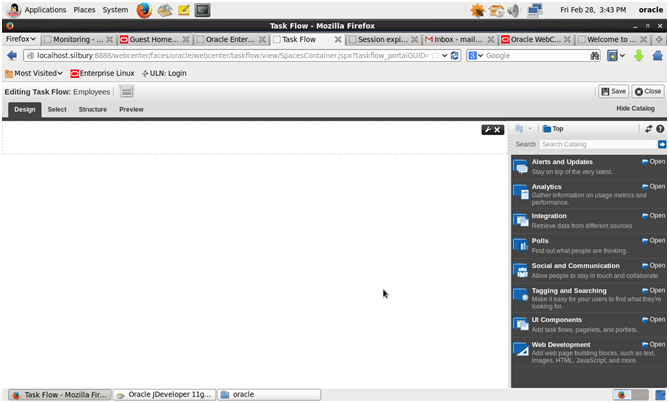
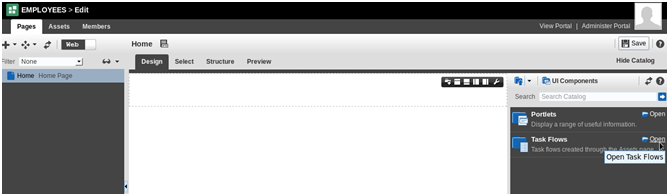
→ Make task flow available
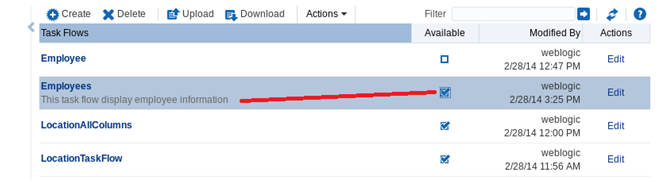
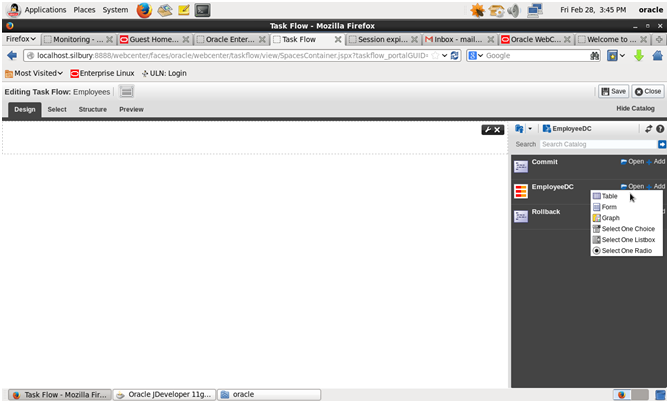
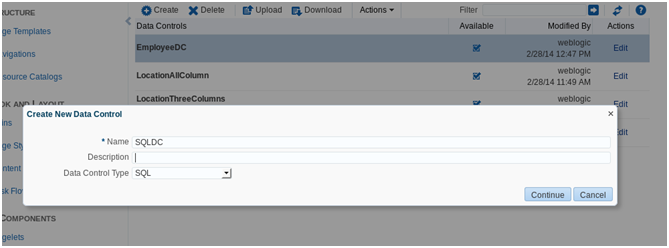
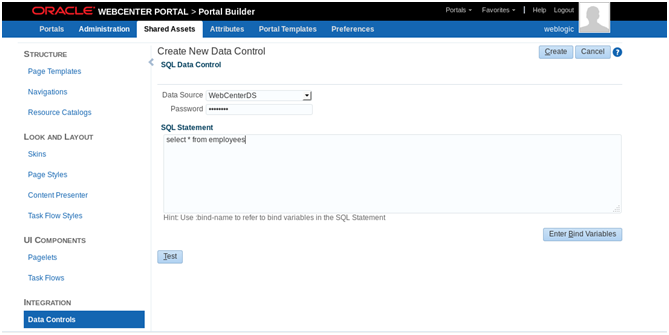
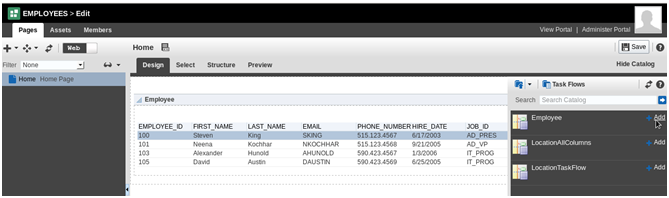
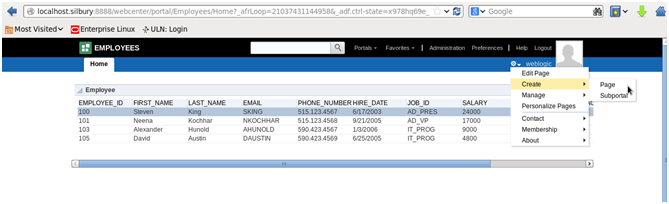
→ Click on Edit and Integration

→ Click open Data Control

→ Click Open EmployeeDC

→ Add Employee DC

→ Click On as Table

→ Click on default next and then create. Table will be there in Taskflow. Click Save then Close.

→. Now click on Portals on top Menu -< Create Portal

->Click Create

→ Click View your portal

→ Edit you page as below to add content

→ Click Open on UI components

→ Click Open On task Flows

→ Add Employees and save.

→ Click Save and then click on View Portal

→ This is final portal

→ Can Create more page like this.

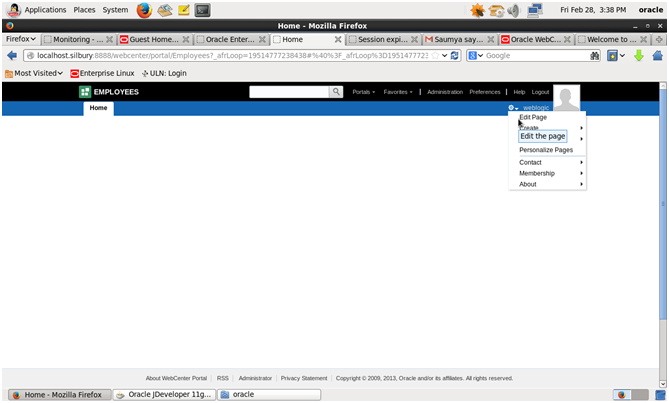
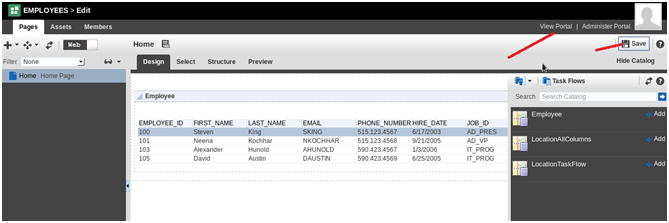
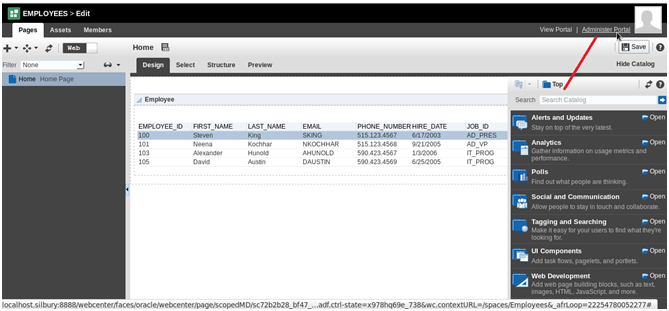
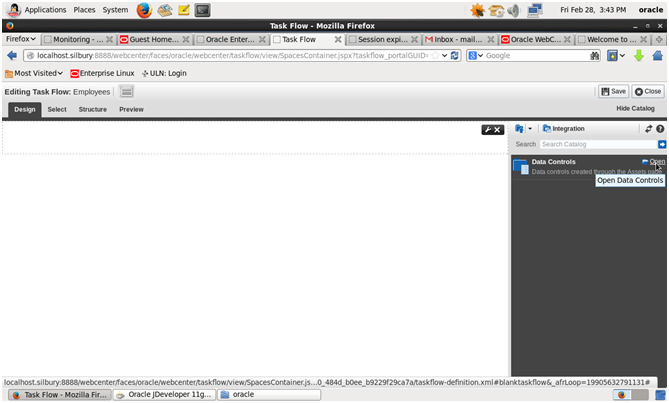
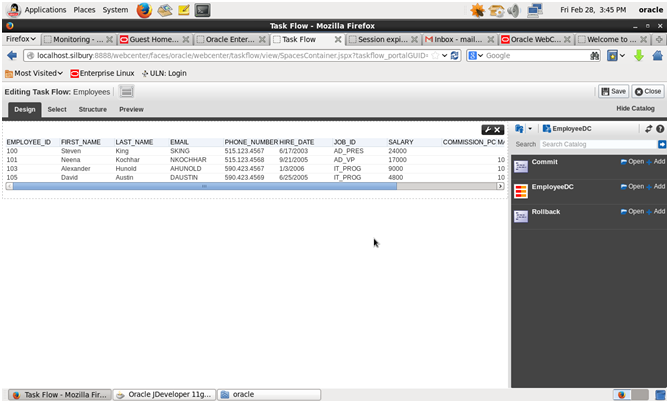
→ If you want to navigate back to Data control or change query or add new task flow -click on edit page then Administer Portal

→ There you can edit data control and task flows.

Watch Video here

Happy learning with Vinay Kumar

Fixed- No service defined for COLLECTION_GET_ADMIN_MARKED_CONFIG.

When you made connection between Webcenter portal and Webcenter content and you got error like this

oracle.stellent.ridc.protocol.ServiceException: No service defined for COLLECTION_GET_ADMIN_MARKED_CONFIG.

Don’t be afraid .Simply in order to resolve this, we need to enable folders_g in UCM and disable the FrameworkFolder if you found.Its not there in PS7.Enable component because it is not supported to have them both enabled at the same time.

Login to UCM with an admin user and select Admin Server in the administration section:

Select Component Manager on the left hand side and click on advanced component manager to have more control. In the basic component manager, the folders_g component is not listed so we need to go the advanced manager

In the Enabled Components list, select FrameworkFolders and disable it.From the disabled list, select folders_g and enable it.

Now restart UCM server.

Happy Learning with Vinay Kumar in techartifact….