Creating Data Control & Task flow in Webcenter Portal Builder

Prerequisite – Webcenter portal and Webcenter Spaces should be installed and there schemas as well.

Database should be installed in database. For this sample demo –I created sample tables in Webcenter schema .

You can connect to database using creating new connection

→ Please find attached script and execute in the database.

→ Open the link – http://localhost.silbury:8888/webcenter (Might be localhost for you)

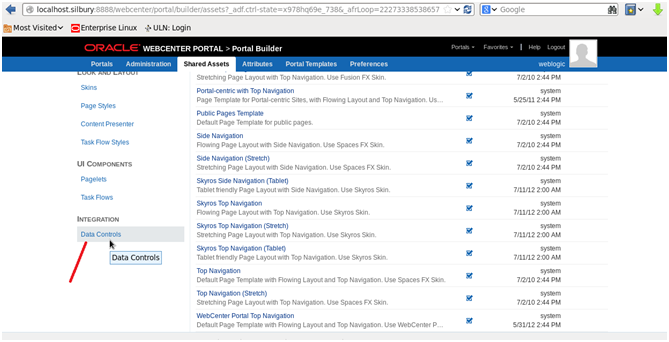
→ Go to Shared Asset

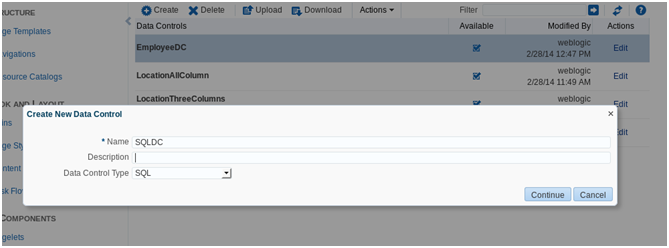
→ Go to Data Control – Create

→ Click continue.

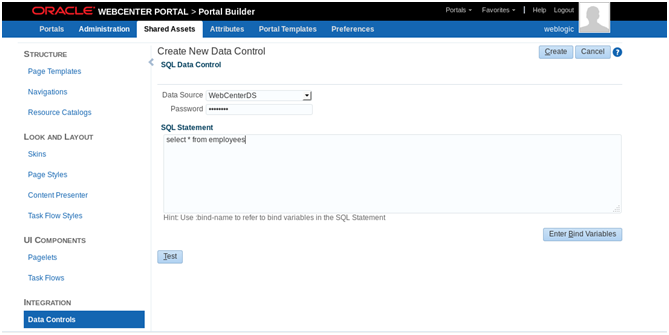
→ Select WebCenterDs – enter password- enter sql query as below in screenshot

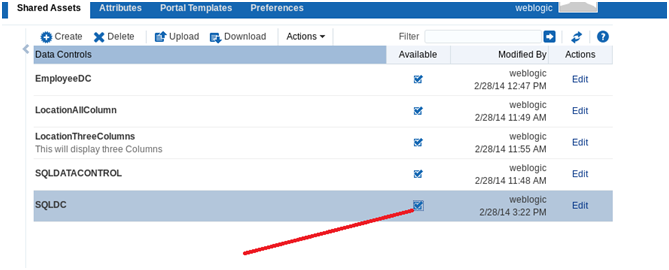
→ Click Create.And make available for using in catalog .

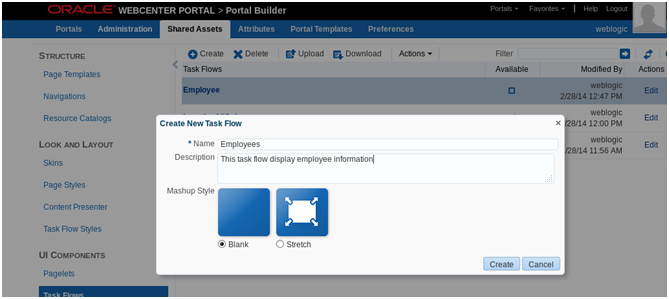
→ Now Click on Taskflow -Create

→ Make task flow available

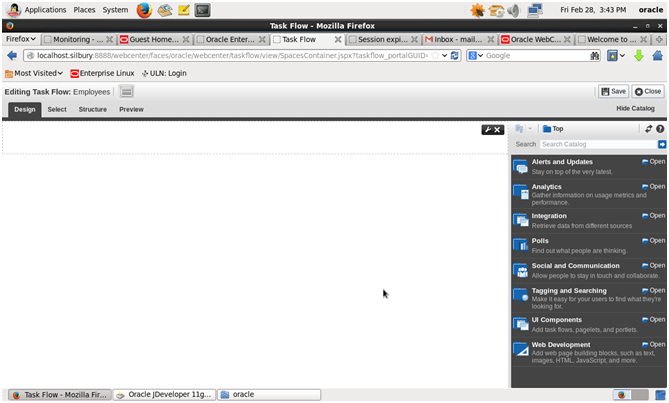
→ Click on Edit and Integration

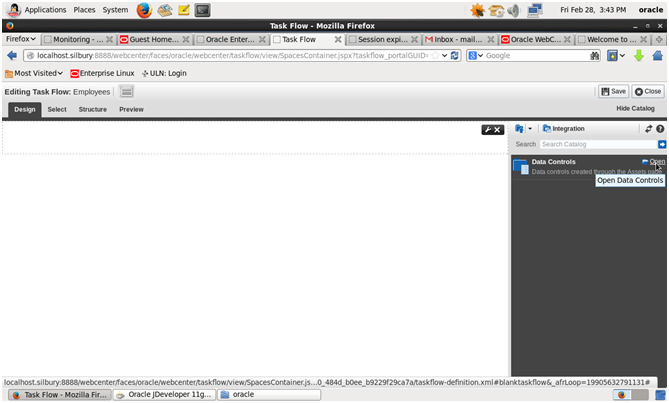
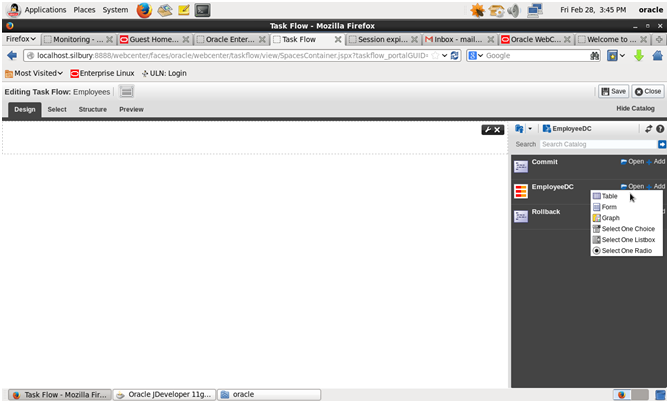
→ Click open Data Control

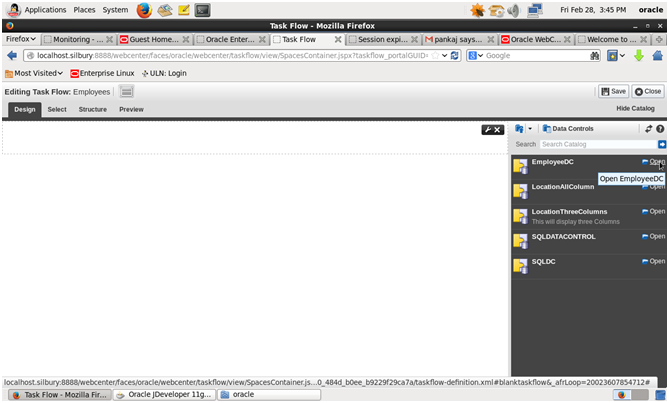
→ Click Open EmployeeDC

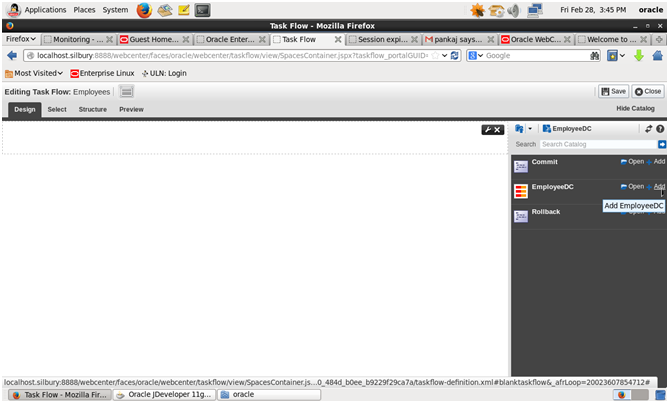
→ Add Employee DC

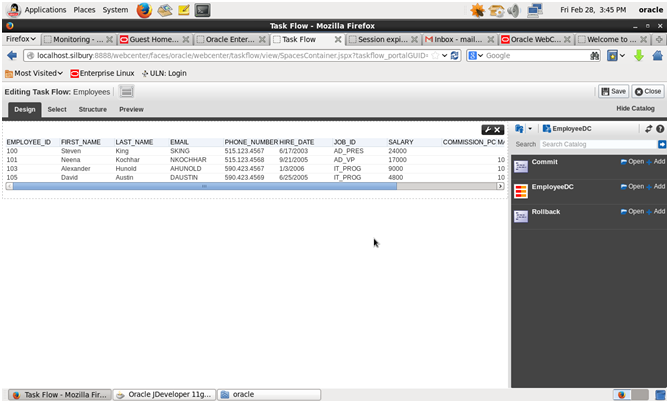
→ Click On as Table

→ Click on default next and then create. Table will be there in Taskflow. Click Save then Close.

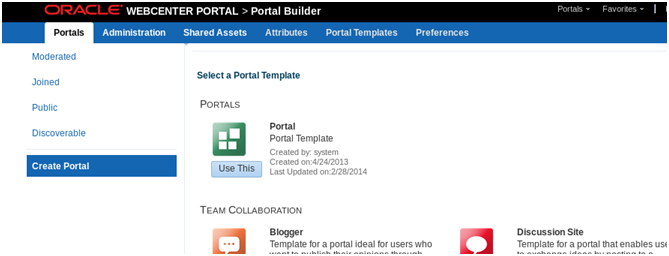
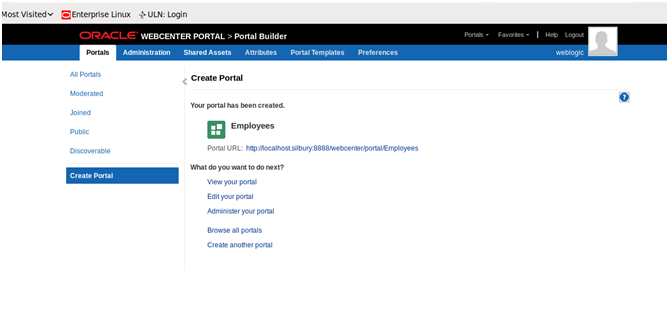
→. Now click on Portals on top Menu -< Create Portal

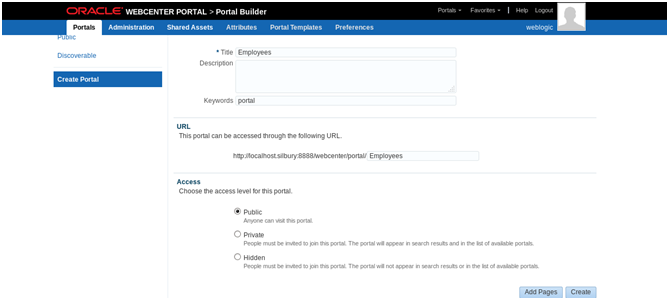
->Click Create

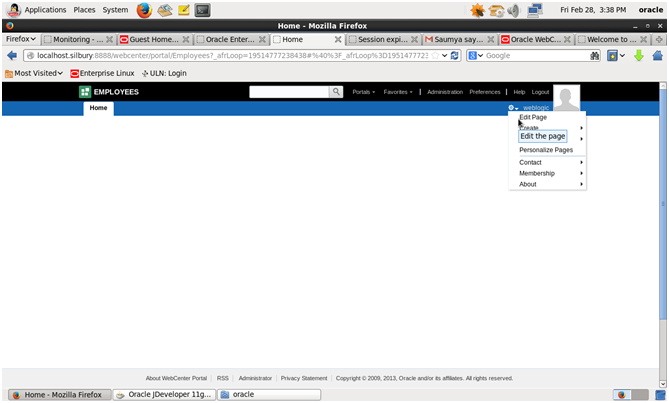
→ Click View your portal

→ Edit you page as below to add content

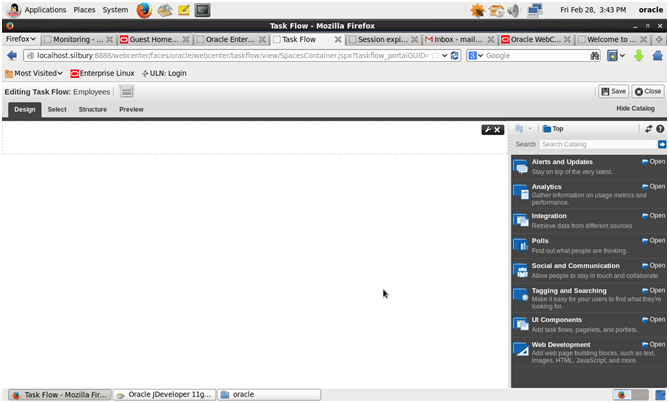
→ Click Open on UI components

→ Click Open On task Flows

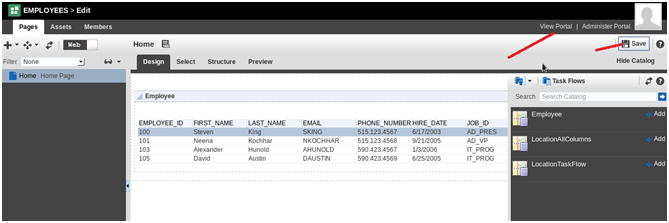
→ Add Employees and save.

→ Click Save and then click on View Portal

→ This is final portal

→ Can Create more page like this.

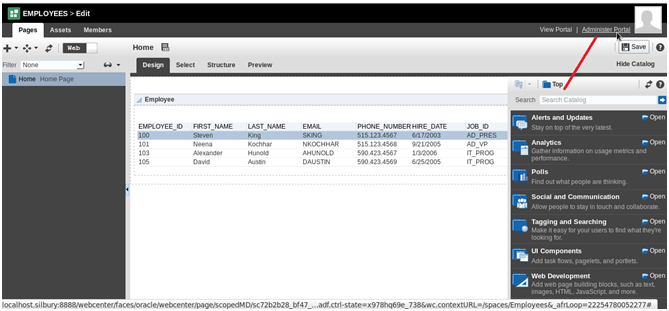
→ If you want to navigate back to Data control or change query or add new task flow -click on edit page then Administer Portal

→ There you can edit data control and task flows.

Watch Video here

Happy learning with Vinay Kumar

Dynamic Taskflow with conditional activation

Use Case – How dynamic task flow activated conditionally.

Implementation – We have two ADF application .One is consumer application which have two task flow

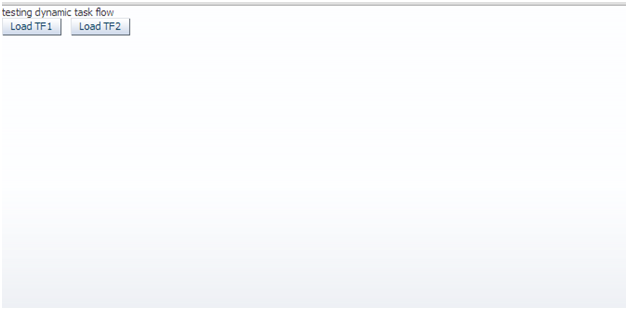
Now we have consumer application which show no task flow on load.Task flow will be shown on click of button .If you click task flow 1 then tf1 will be called and vice versa.Till the button is clicked neither tf1, nor tf2 wud be executed.

Create Producer application-

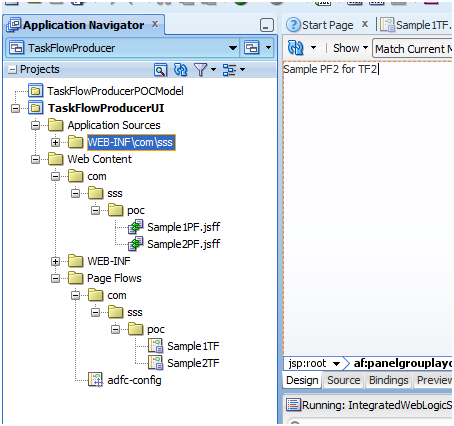
Create an new ADF application. Create two new task flow as Sample1TF and Sample2TF as below –


Now in each task flow drag drop and view activity and Sample1PF in above screenshot.Same steps need to be done for Sample2TF. Drag drop again an view activity as Sample2PF.jsff

Sample2PF.jsff will be like this


Now project structure would be like

Now the deploy this project as ADF library jar.
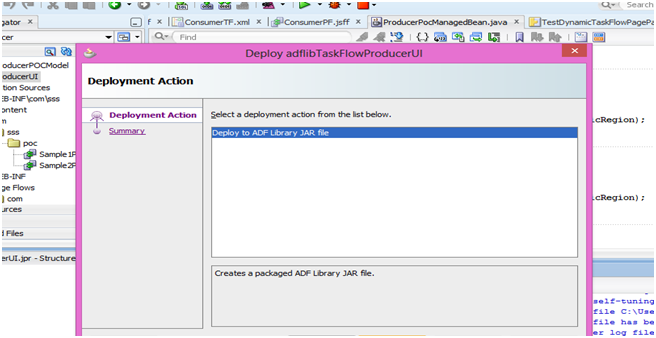

Create Consumer Application –

Now we will be creating an consumer application. We will create an .jsff page with two button. Clicking on any button will called specific task flow.

We will drag drop region in the page and task id will be called .Binding of the page is as follow-
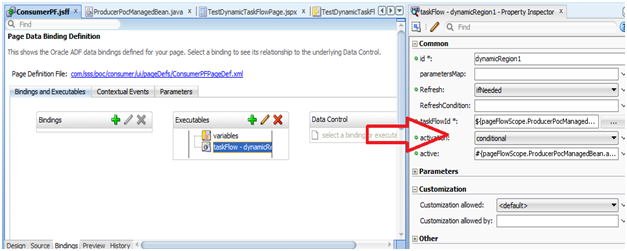

activation: Though you can specify values like conditional/deferred/active for this flag, in this post I discuss conditional activation. Setting activation=conditional, activates the ADF region if the EL expression set as a value for the task flow binding ‘active’ property(discussed below) returns true

active and task flow id will passed through an managed bean.Code of following bean as below

public class ProducerPocManagedBean {

private String taskFlowId = “/WEB-INF/com/sss/poc/Sample1TF.xml#Sample1TF”;

private Boolean activateRegion = Boolean.FALSE;

private RichRegion pocDynamicRegion;

public ProducerPocManagedBean() {

}

public TaskFlowId getDynamicTaskFlowId() {

return TaskFlowId.parse(taskFlowId);

}

public void setTaskFlowId(String taskFlowId) {

this.taskFlowId = taskFlowId;

}

public String getTaskFlowId() {

return taskFlowId;

}

public void setActivateRegion(Boolean activateRegion) {

this.activateRegion = activateRegion;

}

public Boolean getActivateRegion() {

return activateRegion;

}

public void loadTF1AL(ActionEvent actionEvent) {

// Add event code here…

activateRegion = Boolean.TRUE;

taskFlowId = “/WEB-INF/com/sss/poc/Sample1TF.xml#Sample1TF”;

AdfFacesContext.getCurrentInstance().addPartialTarget(pocDynamicRegion);

}

public void loadTF2AL(ActionEvent actionEvent) {

// Add event code here…

activateRegion = Boolean.TRUE;

taskFlowId = “/WEB-INF/com/sss/poc/Sample2TF.xml#Sample2TF”;

AdfFacesContext.getCurrentInstance().addPartialTarget(pocDynamicRegion);

}

public void setPocDynamicRegion(RichRegion pocDynamicRegion) {

this.pocDynamicRegion = pocDynamicRegion;

}

public RichRegion getPocDynamicRegion() {

return pocDynamicRegion;

}

}

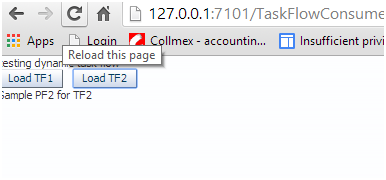
Then drag drop this jsff into one .jspx page. That’s all .Now you can run the application. Following will be screenshot of the page.
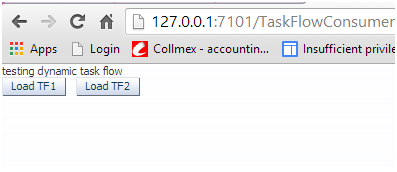

Click on button Load TF1
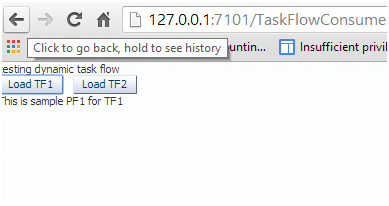

Click on button Load TF2

check attached for source code

DynamicTaskFlowPOC

Happy Learning with Vinay Kumar in techartifact
ORA-01078: failure in processing system parameters LRM-00109: could not open parameter file-Fixed

Requirement- When starting up database following occurs:SQL> startup
ORA-01078: failure in processing system parameters
LRM-00109: could not open parameter file ‘/opt/oracle/product/11.2.0/dbhome_1/dbs/inittest01.ora’

I have faced this problem , while setting up an new image of vmware. I am starting server and i got this error.What does this mean –

Reason-
Database start using spfile (Default). In Unix default path is $ORACLE_HOME/dbs. If spfile is not present it looks for pfile at same path. If pfile is also not present it will give above message.

Implementation- If you have spfie then you can copy default values from spfile to pfile and create pfile.But what if you don’t have spfile.you have to create an pfile

How to create pfile –

When database starts it writes list of non default parameters in alert log files. We can use these values to create a pfile and start the database.

Find you alert log file and open it. This is Database Management Software Oracle 11g, Here you will see entry like this:

System parameters with non-default values:
processes = 150
sga_target = 512M
control_files = “/opt/oracle/test01/dbs/control01.ctl”
control_files = “/opt/oracle/test01/dbs/control02.ctl”
control_files = “/opt/oracle/test01/dbs/control03.ctl”
db_block_size = 8192
compatible = “10.2.0.1.0”
log_archive_dest_1 = “LOCATION=/opt/oracle/test01/archive”
log_archive_dest_state_1 = “ENABLE”
log_archive_format = “%t_%s_%r.dbf”
log_archive_max_processes= 10
log_checkpoint_interval = 9999
log_checkpoint_timeout = 0
db_file_multiblock_read_count= 16
db_recovery_file_dest = “/opt/oracle/test01/flash_recovery_area”
db_recovery_file_dest_size= 2G
undo_management = “AUTO”
undo_tablespace = “UNDOTBS1”
remote_login_passwordfile= “EXCLUSIVE”
db_domain = “agilis.com”
job_queue_processes = 32
core_dump_dest = “/opt/oracle/test01/diag/cdump”
audit_file_dest = “/opt/oracle/test01/adump”
open_links = 10
db_name = “test01”
open_cursors = 500
optimizer_index_cost_adj = 20
optimizer_index_caching = 90
pga_aggregate_target = 128M
diagnostic_dest = “/opt/oracle/test01/diag”
Tue May 31 10:55:29 2011
PMON started with pid=2, OS id=4675

Create pfile using these values:

[[email protected]]$ cd /opt/oracle/product/11.2.0/dbhome_1/dbs/
[[email protected]]$ vi inittest01.ora
Copy non default parameter values from alert log in this file and save it. This is your pfile, Start the database using this pfile.

Start the Database using Pfile:

[[email protected] dbs]$ export ORACLE_SID=test01
[[email protected] dbs]$ sqlplus sys as sysdba
SQL*Plus: Release 11.2.0.2.0 Production on Fri Jun 24 15:53:16 2011
Copyright (c) 1982, 2010, Oracle. All rights reserved.
Enter password:
Connected to an idle instance.
SQL> startup pfile=’$ORACLE_HOME/dbs/inittest01.ora’
ORACLE instance started.
Total System Global Area 534462464 bytes
Fixed Size 2228200 bytes
Variable Size 163577880 bytes
Database Buffers 360710144 bytes
Redo Buffers 7946240 bytes
Database mounted.
Database opened.
SQL>

Create spfile from pfile:

SQL> create spfile from pfile=’$ORACLE_HOME/dbs/inittest01.ora’;
File created.

Shutdown the database and restart it will use spfile (Default) and problem is solved. I have also published a list of SPFILE Commands.

Happy coding with Vinay Kumar in techartifact….