Multiple file upload with Jquery in ADF/Webcenter

Hi All,

File upload in Oracle ADF is done with af:inputFile component.

To implement file upload functionality, follow the below steps:

1. add af:inputFile component to the form.
2. set usesUpload property of the af:form element to true.
3. create binding of inputFile and its valueChangeListener in managed bean.
4. write code to implement file upload and display its content in text area as shown in below example:

fileupload1

standard implementation of inputfile is like

jspx code:

 <af:panelGroupLayout id="pgl1" layout="vertical">
              <af:panelGroupLayout id="pgl2" layout="horizontal">
                <af:inputFile label="Upload File" id="if1"
                              binding="#{pageFlowScope.UploadBean.inputFile}"
                              valueChangeListener="#{pageFlowScope.UploadBean.FileUploadVcListener}"
                              autoSubmit="true"/>
                <af:spacer width="10" height="10" id="s1"/>
                <af:commandButton text="Upload" id="cb1"
                                  disabled="#{pageFlowScope.UploadBean.inputFile.value == null ? true : false}"
                                  partialTriggers="if1"
                                  actionListener="#{pageFlowScope.UploadBean.onUploadFile}"/>
              </af:panelGroupLayout>
              <af:spacer width="10" height="10" id="s3"/>
              <af:panelFormLayout id="pfl1" partialTriggers="cb1">
                <af:inputText label="File Name" id="it2" columns="30"
                              readOnly="true"
                              value="#{pageFlowScope.UploadBean.fileName}"/>
                <af:inputText label="File Content" id="it1" rows="10"
                              columns="100" readOnly="true"
                              value="#{pageFlowScope.UploadBean.fileContent}"/>
              </af:panelFormLayout>
              <af:spacer width="10" height="10" id="s2"/>
            </af:panelGroupLayout>

Managed Bean Code:

import java.io.IOException;
import java.io.InputStream;
import java.io.StringWriter;
import javax.faces.event.ActionEvent;
import javax.faces.event.ValueChangeEvent;
import oracle.adf.view.rich.component.rich.input.RichInputFile;
import org.apache.commons.io.IOUtils;
import org.apache.myfaces.trinidad.model.UploadedFile;

public class UploadBean {
    private RichInputFile inputFile;
    private UploadedFile file;
    private String fileContent;
    private String fileName;
    private InputStream inputstream;

    public UploadBean() {
        super();
    }

    public void FileUploadVcListener(ValueChangeEvent valueChangeEvent) {
        resetValue();
        file = (UploadedFile)valueChangeEvent.getNewValue();
        try {
            inputstream = file.getInputStream();
        } catch (IOException e) {
            e.printStackTrace();
        }
    }

    public void onUploadFile(ActionEvent actionEvent) {
        if (file != null && inputstream != null) {
            fileName = file.getFilename();
            StringWriter writer = new StringWriter();
            try {
                IOUtils.copy(inputstream, writer);
                fileContent = writer.toString();
            } catch (IOException e) {
                e.printStackTrace();
            }
        }
        if (inputFile != null) {
            inputFile.resetValue();
            inputFile.setValid(true);
        }
    }

    public void resetValue() {
        if (fileName != null)
            fileName = null;
        if (fileContent != null)
            fileContent = null;
        if (inputstream != null)
            inputstream = null;
    }

    public void setInputFile(RichInputFile inputFile) {
        this.inputFile = inputFile;
    }

    public RichInputFile getInputFile() {
        return inputFile;
    }

    public void setFile(UploadedFile file) {
        this.file = file;
    }

    public UploadedFile getFile() {
        return file;
    }

    public String getFileContent() {
        return fileContent;
    }

    public String getFileName() {
        return fileName;
    }
}

Now if you want to have validation then you do validation for file type,file size or any other validations in ValueChangeListener. One of biggest problem is , in large applications, File will be uploaded to a temporary location and if the ere is large user then huge sizes of files will be stored in server location. That can create issue.Because ADF Faces will temporarily store incoming files (either on disk or in memory), by default it limits the size of acceptable incoming requests to avoid denial-of-service attacks that might attempt to fill a hard drive or flood memory with uploaded files. By default, only the first 100 kilobytes in any one request will be stored in memory. Once that has been filled, disk space will be used. Again, by default, that is limited to 2,000 kilobytes of disk storage for any one request for all files combined. Once these limits are exceeded, the filter will throw an EOFException . Files are, by default, stored in the temporary directory used by java.io.File.createTempFile() , which is usually defined by the system property java.io.tmpdir . Obviously, this will be insufficient for some applications, so you can configure these values using three servlet context initialization parameters:

  <context-param>
    <!-- Maximum memory per request (in bytes) -->
    <param-name>oracle.adf.view.faces.UPLOAD_MAX_MEMORY</param-name>
    <!-- Use 500K -->
    <param-value>512000</param-value>
  </context-param>
  <context-param>
    <!-- Maximum disk space per request (in bytes) -->
    <param-name>oracle.adf.view.faces.UPLOAD_MAX_DISK_SPACE</param-name>
    <!-- Use 5,000K -->
    <param-value>5120000</param-value>
  </context-param>
  <context-param>
    <!-- directory to store temporary files -->
    <param-name>oracle.adf.view.faces.UPLOAD_TEMP_DIR</param-name>
    <!-- Use an ADFUploads subdirectory of /tmp -->
    <param-value>/tmp/ADFUploads/</param-value>
  </context-param>

  <!-- This filter is always required by ADF;  one of its functions is 
          file upload. -->
  <filter>
    <filter-name>adfFaces</filter-name>
    <filter-class>oracle.adf.view.faces.webapp.AdfFacesFilter</filter-class>
  </filter>

. Ideally, we should have client side validations , which will ignore all irrelevant files.

So if you use this component, you should delete your file after cancel upload process or after persist the file from temporary locations.

So today, we will discuss another approach for bypassing this scenario. We will use one jquery plugin to have client side validation for size, extension etc.

I will be using this jquery plugin , There are many, you can choose anyone.

Lets look at implementation now
This will be my jspx page

uploadPng

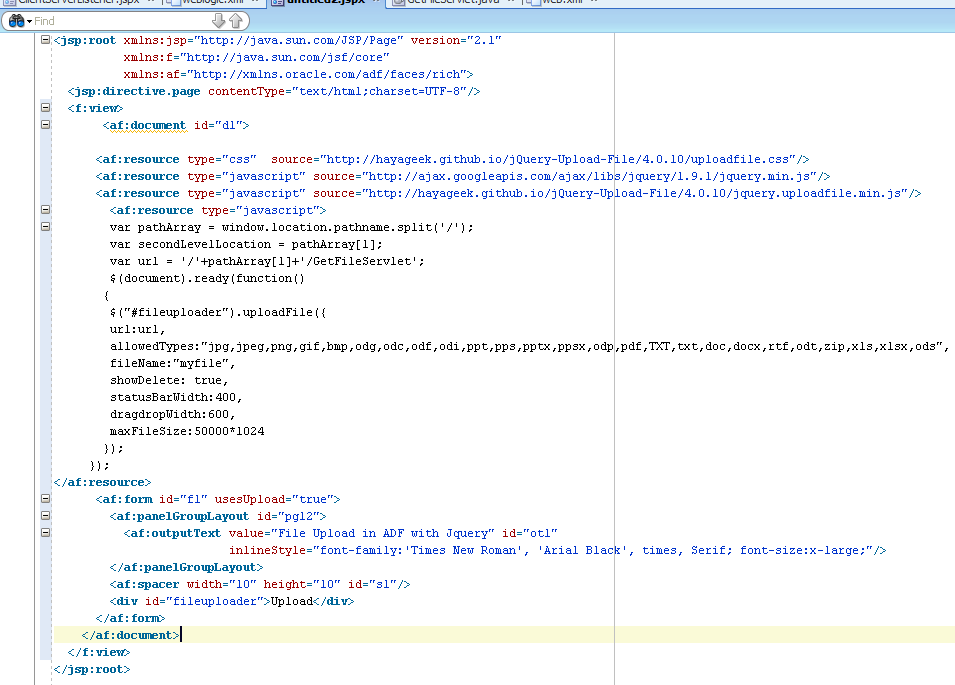
First thing, you need to include css and JS file as below

 <af:resource type="css"  source="http://hayageek.github.io/jQuery-Upload-File/4.0.10/uploadfile.css"/>
 <af:resource type="javascript" source="http://ajax.googleapis.com/ajax/libs/jquery/1.9.1/jquery.min.js"/>
 <af:resource type="javascript" source="http://hayageek.github.io/jQuery-Upload-File/4.0.10/jquery.uploadfile.min.js"/>

And you need to write js in your page as below

   <af:resource type="javascript">
        var pathArray = window.location.pathname.split('/');
        var secondLevelLocation = pathArray[1];
        var url = '/'+pathArray[1]+'/GetFileServlet';  // this will give you post method call to this url
        $(document).ready(function()     // standard jquery ready function
       {
        $("#fileuploader").uploadFile({ 
        url:url,
        allowedTypes:"jpg,bmp,ppt,pps,pptx,pdf,TXT,txt,doc,docx,rtf,odt,zip,xls,xlsx", // you can define allowed extension type.
        fileName:"myfile",
        showDelete: true,   // if you want to show delete icon for each uploaded file
        statusBarWidth:400,  
        dragdropWidth:600,
        maxFileSize:50000*1024   // add maximum upload size for file.
       });
     });
</af:resource>

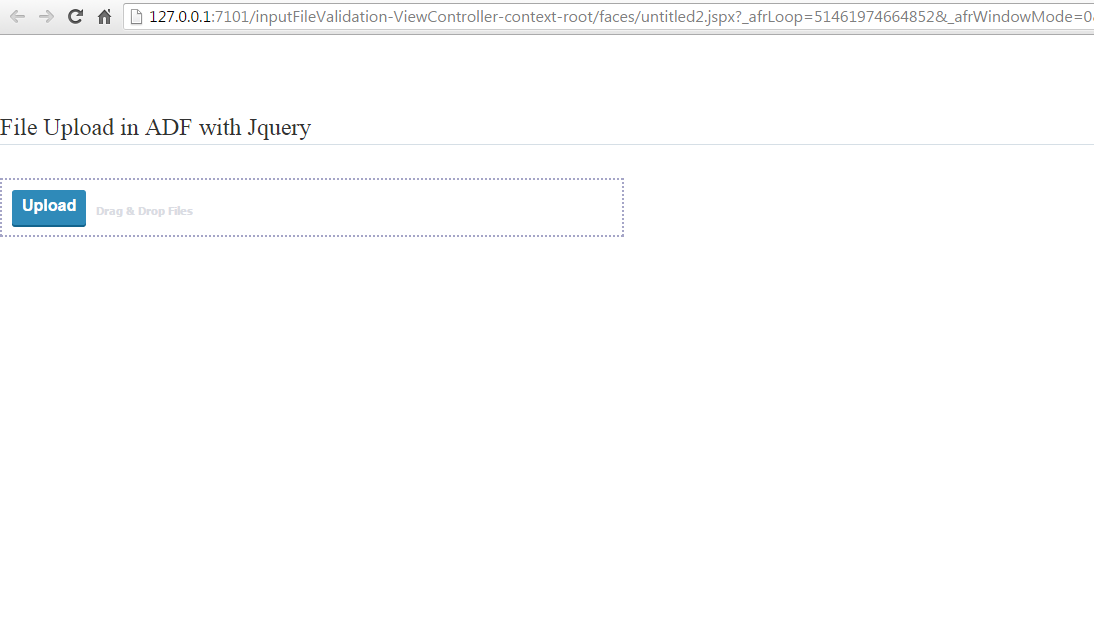
We will add div as below

 <div id="fileuploader">Upload</div>

When you upload then call will go to GetFileServlet , which is mapped in web.xml .
I am also using Apache common file upload to handle multitype request.

servlet

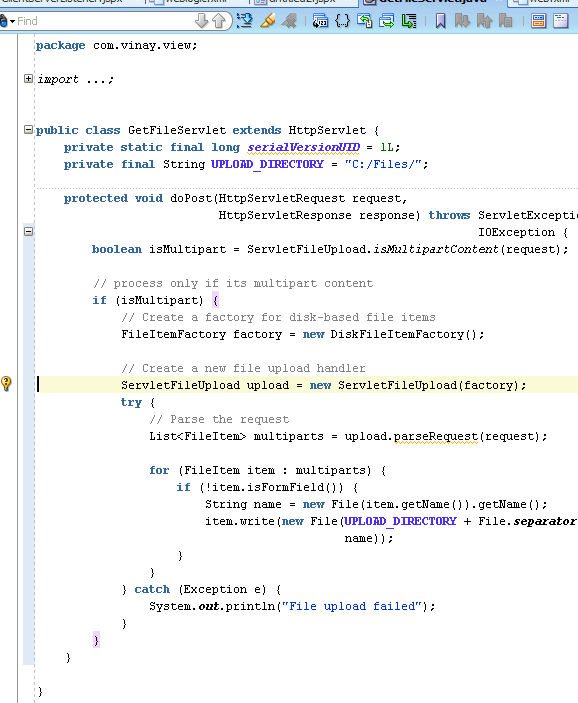
You can store these document in db, webcenter content using RIDC. for sample purpose, I am storing these documents in file store
in C drive.

You also need to define mapping of servlet in web.xml as below

urlmapping

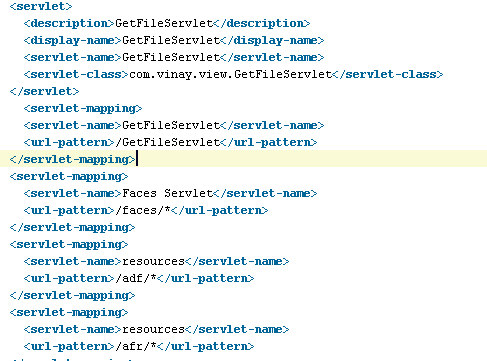
Now run the application.

Output

upload11

Now select some files and upload

upload22

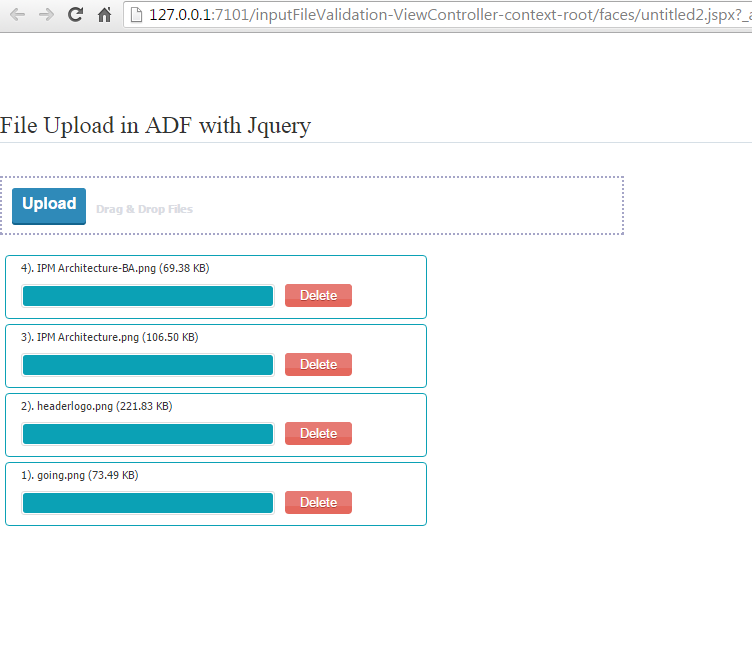
great. File uploaded to system.

uploadedd

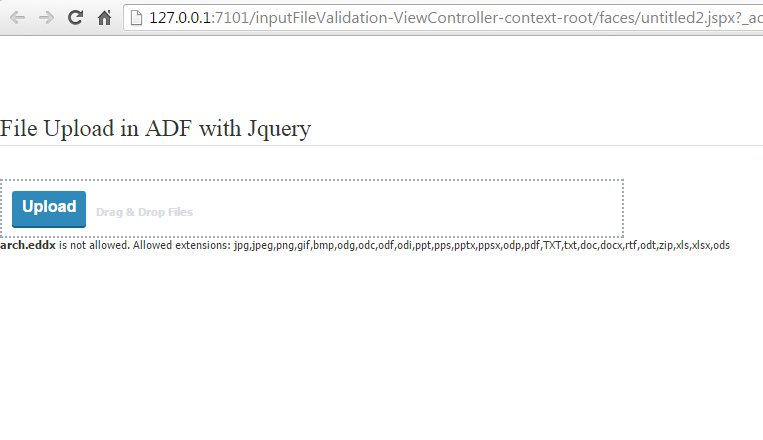
now upload some invalid file,I tried file with eddx extension and you will get validation happened on client side.

upload555

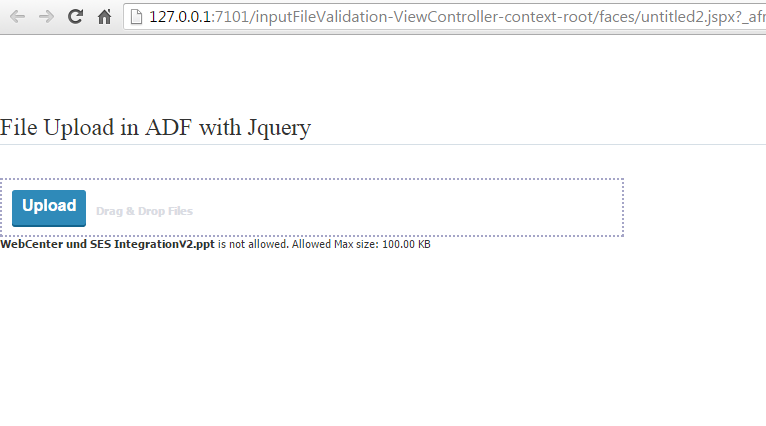
Now try uploaded with large file. I reduce the size limit

uploaded555

Storing file is file system is just for demo. You should store these files in webcenter content using RIDC.

So it is very simple and easy to use and give lot of freedom to use following features.

jQuery File upload plugin has the following features.
Single File Upload
Multiple file Upload (Drag & Drop)
Sequential file upload
File Restrictions
Localization (Multi-language)
Sending Form Data
Adding HTML elements to progressbar
Custom UI
Upload Events
Delete / Download Uploaded files
Image Preview
Show previous uploads

Well that all. Happy uploading in ADF/webcenter.

Finding component in region by javascript in adf

Quick Tip – If you are search component in region by javascript then follow code below

var region = AdfPage.PAGE.findComponentByAbsoluteId("regionId");
if(region != null){
  var comp = region.findComponent("ID");
} 

or

var comp = AdfPage.PAGE.findComponentByAbsoluteId("regionId:ID"); 

And if you are searching component through java then follow this blog entry by Edwin

Happy learning with Vinay

Build Secure Application Using JSON Web Tokens (JWT)

JSON Web Token (JWT) is a compact, URL-safe means of representing claims to be transferred between two parties. The claims in a JWT are encoded as a JSON object that is used as the payload of a JSON Web Signature (JWS) structure or as the plaintext of a JSON Web Encryption (JWE) structure, enabling the claims to be digitally signed or integrity protected with a Message Authentication Code (MAC) and/or encrypted.

Below picture will give more better explanation

The claims in a JWT are encoded as a JSON object that is base64url encoded and consists of zero or more name/value pairs (or members), where the names are strings and the values are arbitrary JSON values. Each member is a claim represented by the JWT.

What JWT contains – JWT consists of three main components: a header object, payload object, and a signature. These three properties are encoded using base64, then concatenated with periods as separators.

for example

xxxxxxxxxxxxxxxxxx.yyyy.zzzzzzzzzzzzzzzzzzzzzzzzz

xxxxxxxxxxxxxxxxxxxxx – header
yyyy – – claims/payload
zzzzzzzzzzzzzzzzzzzz – signature

Header: The header contains the metadata for the token and at a minimal contains the type of the signature and/or encryption algorithm
Claims: The claims contains any information that you want signed
JSON Web Signature (JWS): The headers and claims digitally signed using the algorithm in the specified in the headerStructure of a JWT

JSON Web Token example:

eyJhbGciOiJIUzI1NiIsInR5cCI6IkpXVCJ9.eyJpc3MiOiJ0b3B0YWwuY29tI iwiZXhwIjoxNDI2NDIwODAwLCJodHRwOi8vdG9wdGFsLmNvbS9qd3RfY2xhaW1zL2lzX2FkbWluI jp0cnVlLCJjb21wYW55IjoiVG9wdGFsIiwiYXdlc29tZSI6dHJ1ZX0.yRQYnWzskCZUxPwaQupWk iUzKELZ49eM7oWxAQK_ZXw

Since there are 3 parts separated by a ., each section is created differently. We have the 3 parts which are:

header
payload
signature
..

Header

The JWT Header declares that the encoded object is a JSON Web Token (JWT) and the JWT is a JWS that is MACed using the HMAC SHA-256 algorithm. For example:

{
“alg”: “HS256”,
“typ”: “JWT”
}
“alg” is a string and specifies the algorithm used to sign the token.

“typ” is a string for the token, defaulted to “JWT”. Specifies that this is a JWT token.

Payload (Claims)

A claim or a payload can be defined as a statement about an entity that contians security information as well as additional meta data about the token itself.

Following are the claim attributes :

iss: The issuer of the token

sub: The subject of the token

aud: The audience of the token

qsh: query string hash

exp: Token expiration time defined in Unix time

nbf: “Not before” time that identifies the time before which the JWT must not be accepted for processing

iat: “Issued at” time, in Unix time, at which the token was issued

jti: JWT ID claim provides a unique identifier for the JWT

Signature

JSON Web Signatre specification are followed to generate the final signed token. JWT Header, the encoded claim are combined, and an encryption algorithm, such as HMAC SHA-256 is applied. The signatures’s secret key is held by the server so it will be able to verify existing tokens.

JWT-Real world

Advantages of Token Based Approach

JWT approach allows us to make AJAX calls to any server or domain. Since the HTTP header is used to transmit the user information.

Their is no need for having a separate session store on the server. JWT itself conveys the entire information.

Server Side reduces to just an API and static assets(HTML, CSS, JS) can be served via a CDN.

The authentication system is mobile ready, the token can be generated on any device.

Since we have eliminated the need for cookies, we no more need to protect against the cross site requesets.

API Keys provide either-or solution, whereas JWT provide much granular control, which can be inspected for any debugging purpose.

API Keys depend on a central storage and a service. JWT can be self-issued or an external service can issue it with allowed scopes and expiration.

You can use jwt in node.js, angular.js, ruby, Java, .net and other frameworks.
Following is example of JWT generator and verify jwt token

Generate Tokens

import javax.crypto.spec.SecretKeySpec;
import javax.xml.bind.DatatypeConverter;
import java.security.Key;
import io.jsonwebtoken.*;
import java.util.Date;    

//Sample method to construct a JWT

private String createJWT(String id, String issuer, String subject, long ttlMillis) {

//The JWT signature algorithm we will be using to sign the token
SignatureAlgorithm signatureAlgorithm = SignatureAlgorithm.HS256;

long nowMillis = System.currentTimeMillis();
Date now = new Date(nowMillis);

//We will sign our JWT with our ApiKey secret
byte[] apiKeySecretBytes = DatatypeConverter.parseBase64Binary(apiKey.getSecret());
Key signingKey = new SecretKeySpec(apiKeySecretBytes, signatureAlgorithm.getJcaName());

  //Let's set the JWT Claims
JwtBuilder builder = Jwts.builder().setId(id)
                                .setIssuedAt(now)
                                .setSubject(subject)
                                .setIssuer(issuer)
                                .signWith(signatureAlgorithm, signingKey);

 //if it has been specified, let's add the expiration
if (ttlMillis >= 0) {
    long expMillis = nowMillis + ttlMillis;
    Date exp = new Date(expMillis);
    builder.setExpiration(exp);
}

 //Builds the JWT and serializes it to a compact, URL-safe string
return builder.compact();
}

Decode and Verify Tokens

import javax.xml.bind.DatatypeConverter;
import io.jsonwebtoken.Jwts;
import io.jsonwebtoken.Claims;

//Sample method to validate and read the JWT
private void parseJWT(String jwt) {
//This line will throw an exception if it is not a signed JWS (as expected)
Claims claims = Jwts.parser()         
   .setSigningKey(DatatypeConverter.parseBase64Binary(apiKey.getSecret()))
   .parseClaimsJws(jwt).getBody();
System.out.println("ID: " + claims.getId());
System.out.println("Subject: " + claims.getSubject());
System.out.println("Issuer: " + claims.getIssuer());
System.out.println("Expiration: " + claims.getExpiration());
}

Happy secure API call with Vinay in techartifact . 🙂

– See more at:
http://blog.apcelent.com/json-web-token-tutorial-example-python.html#sthash.GzZriR3U.dpuf
http://angular-tips.com/blog/2014/05/json-web-tokens-introduction/

How to Create and verify JWTs in Java